Overview
Let’s try to rump up Azure Cloud Service with Worker Role. We will need to:
- Create Cloud Service environment in Azure.
- Create a Project in Visual Studio. It will be Cloud Service with Worker Role.
- Run the project in Visual Studio.
- Deploy Cloud Service instances to Azure.
- Observe the results.
Step 1: Create Cloud Service Resource in Azure
- Log in to Azure Portal
- Navigate to New and start typing “Cloud Service”
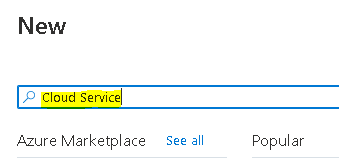
- Choose Cloud Service and click Create
- Fill fields
- Choose your Subscription
- Choose existing or create a new Resource group
- DNS name will be appended with
.cloudapp.net That will create your own DNS namespace. In the example it is called roses. That means that I will be able to access my cloud service withroses.cloudapp.net
- Choose Region that is closest to you
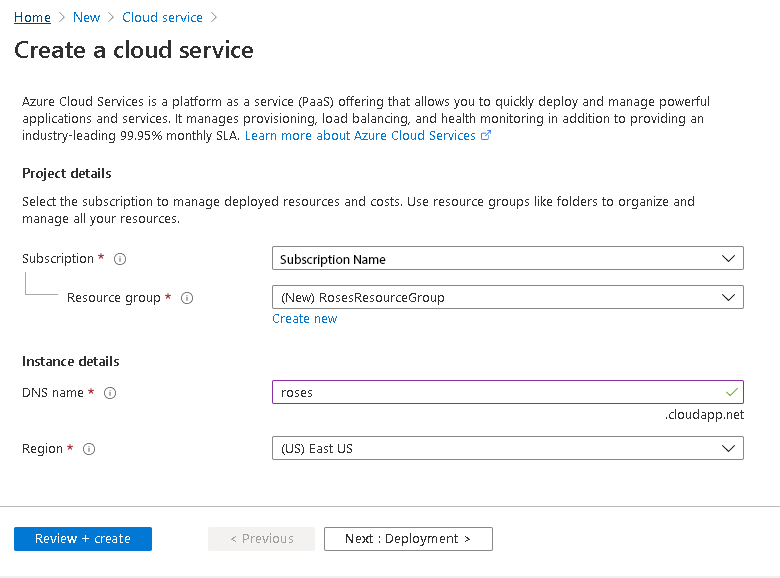
- Choose Review + create
- Your service will start Deployment process
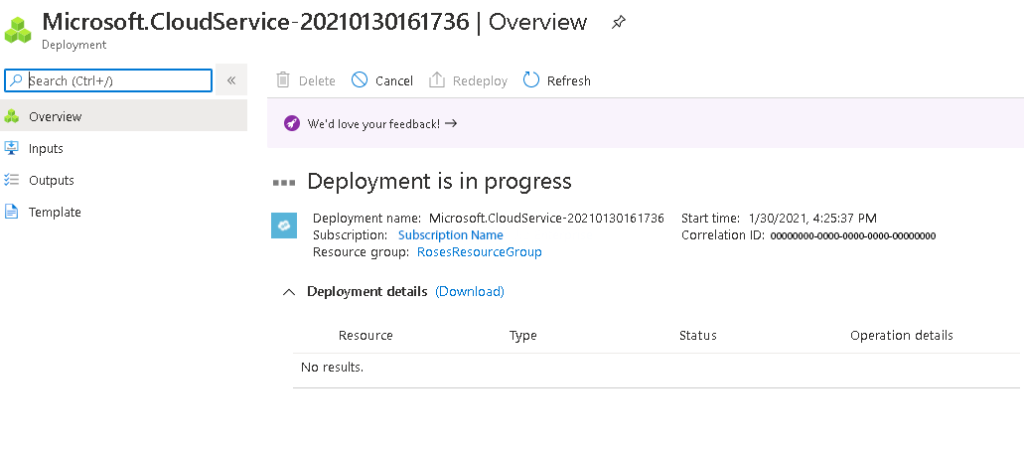
- You will see a notification that your service is successfully deployed and you will be suggested to enter your Cloud Service. If you follow the link you will find out that you have nothing deployed but you have your environment prepared.
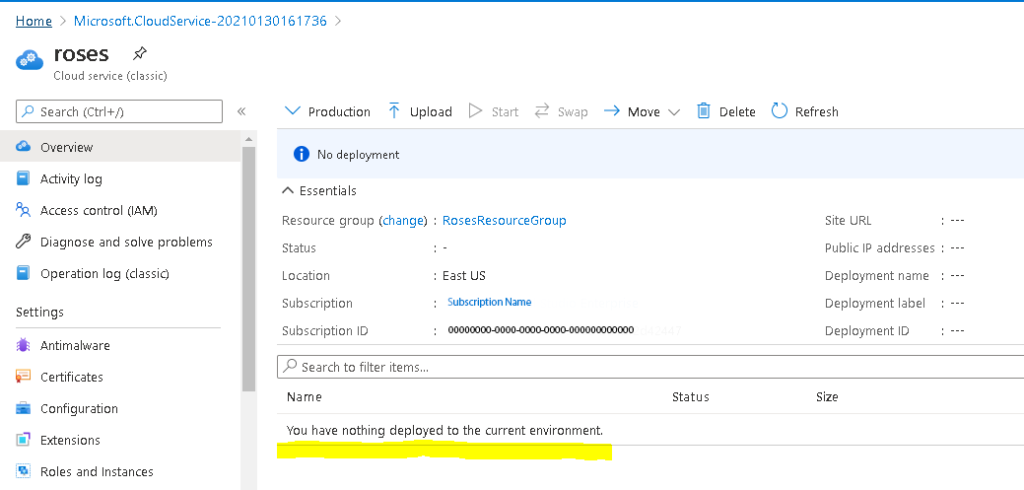
- Now, Let’s deploy something to our cloud service.
Step 2: Create Cloud Service in Visual Studio
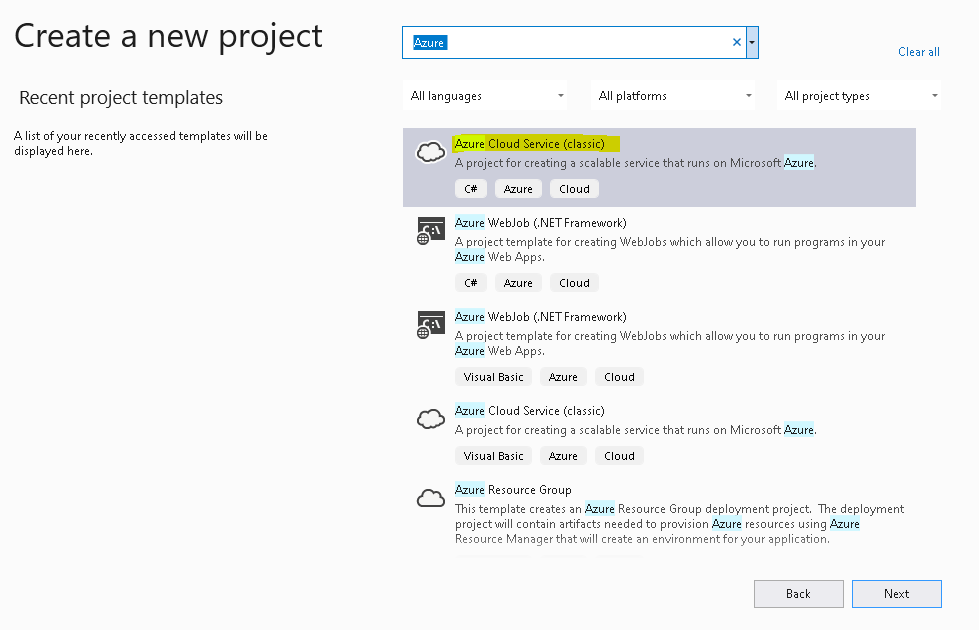
- Open Visual Studio
- Choose Create a new project
- Start typing Azure
- Choose Azure Cloud Service (classic)
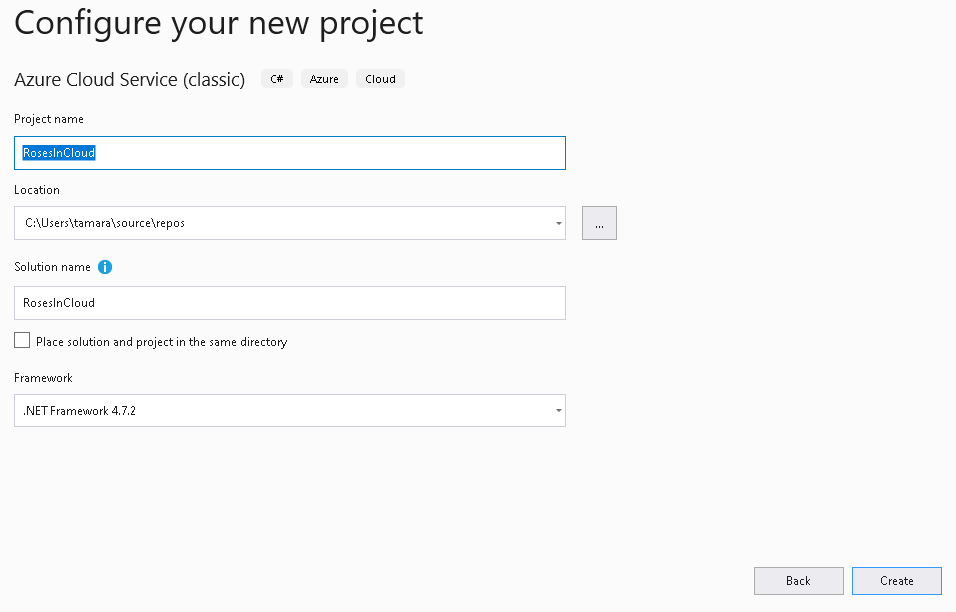
- Configure your new Project and click Create
- Choose Project Name
- Location
- Framework
- Choose Worker Role, rename it if you’d like
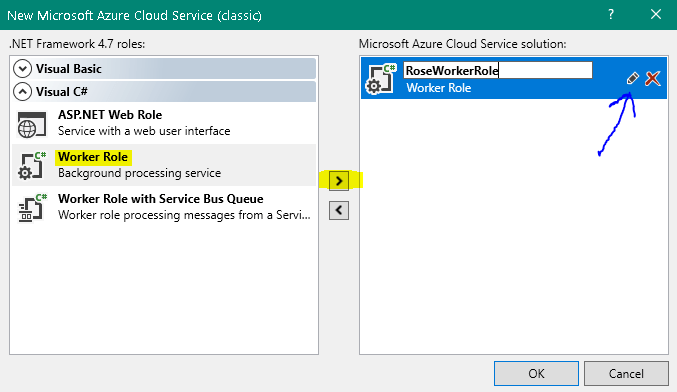
- Click OK
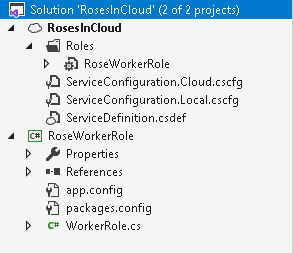
- You will find a created project with Worker Role and predefined cloud service project template
Step 3: Run your Visual Studio Project
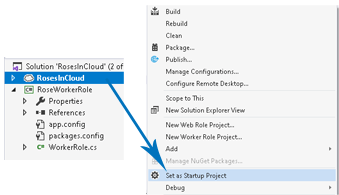
- Right click on the cloud project -> Set Up as Startup Project
- Click Start
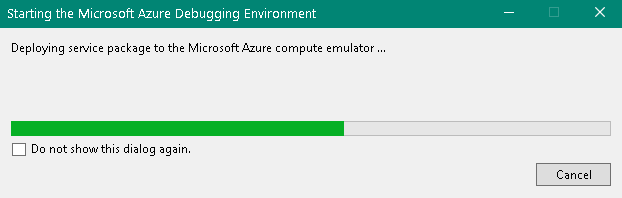
- You will see how Azure Emulator is loading
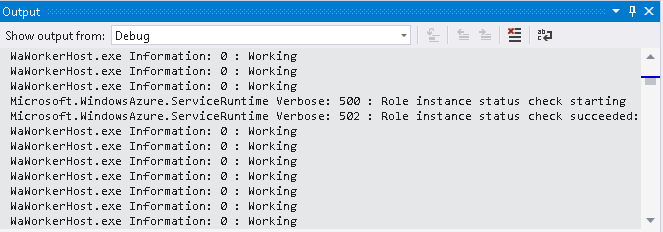
- See Output to understand that your services successfully started and running
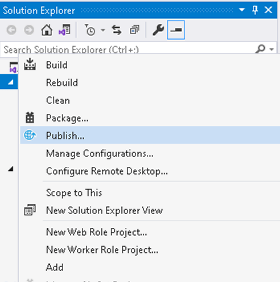
Step 4: Deploy your Cloud Service to Azure
- Right click on your cloud service and choose Publish
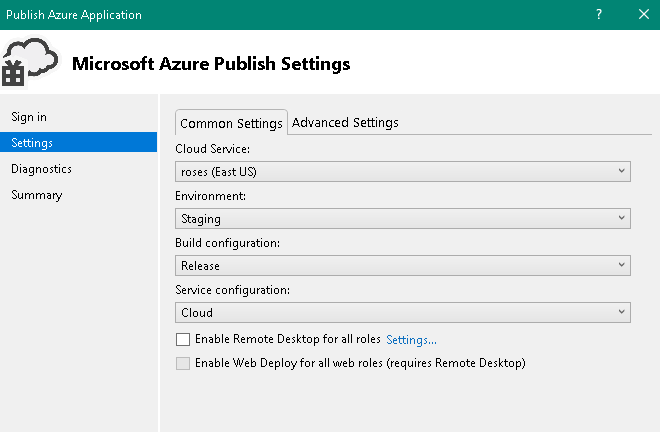
- Sign in to your Azure Account
- Complete Publish Settings
- Cloud Service: to deploy your service to the environment you created in the Step 1, put the same Cloud Service name and location that you chose in the Step 1 (in my example, DNS Name = roses, Region=East US)
- Environment: you can choose Staging as I did or Production.
- Build configuration: Release or Debug
- Service configuration: Cloud
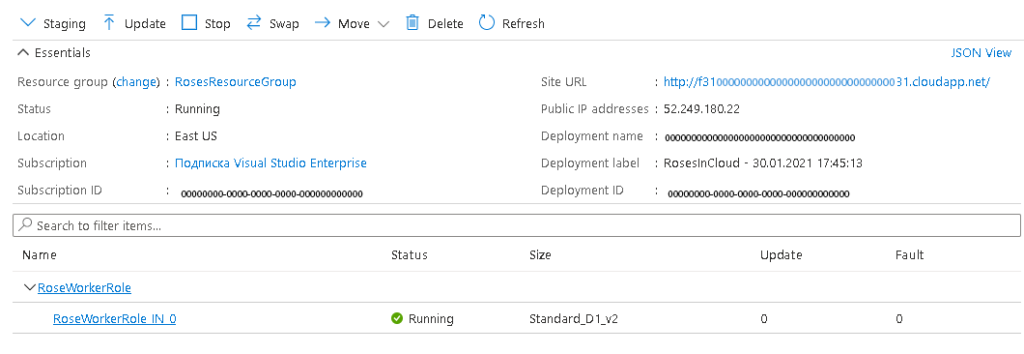
Step 5: Observe the results
- In Visual Studio you will see Activity Logs that show the progress of your service deployment

- Go to Azure Portal and navigate to your Cloud Service. Choose Staging on the top left side if you chose to deploy to Staging. You will see that your service is Busy, that means that it is in process to start the instances. In our case we have configured only one instance of the service, but you can later configure as many as you need to handle the traffic.
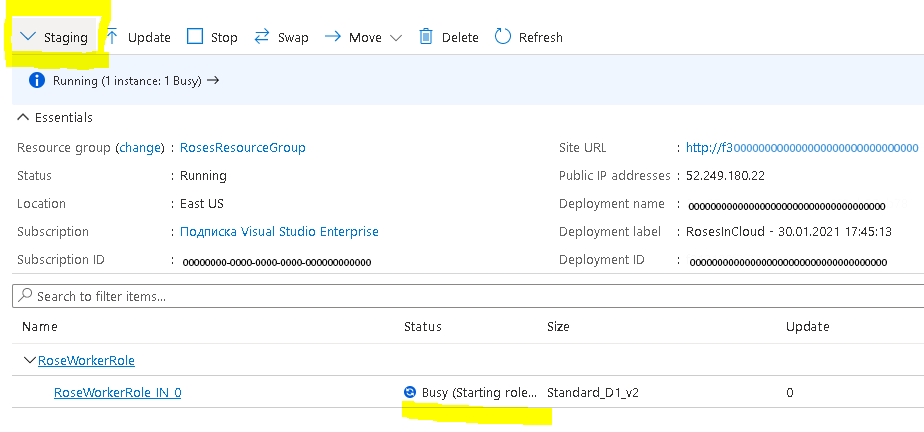
- After a couple of minutes you will see ‘Running’ indicator next to your Worker role. Congratulations! You deployed your Cloud Service to Azure.